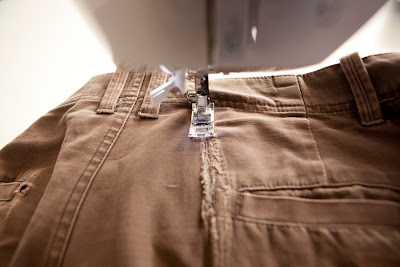
So, using these
1. Find a piece of scrap fabric you can make a patch out of, and cut a patch a little bit bigger than the tear. Ideally, you want the patch fabric to be a similar colour and weight to the item of clothing you're fixing, but it doesn't really matter too much, I just used whatever happened to be lying around, which in this case was grey denim.
2. Cut a piece of Vliesofix (paper-backed fusible webbing) the same size as the patch.
3. Iron the Vliesofix to the patch to fuse it (remember to make sure it's glue-side down! Talking from experience...) and then peel away the backing paper.
4. Turn the item of clothing inside out and iron the patch over the tear.
Instead of using the Vliesofix, you can use an iron-on patch, cut it to size and iron it on. Or, use plain fusible webbing. Cut it to size, put it over the tear, put the patch on top and iron into place.
5. When I was originally shown how to do this, they showed me how to use a straight stitch, going backwards and forwards, gradually working my way across the tear or hole. I've since switched to using a wide-ish zig zag stitch with a narrow stitch length, because I find it easier and quicker.
So, turn the item right side out again and position the needle at the top left of the tear (I find it easier to start there and work my way across and down).
6. Using the zig zag stitch, stitch all the way down to the bottom of the tear. When you get to the bottom, leave your needle down in the fabric, lift the presser foot and turn the fabric (it will pivot around the needle so you don't have to reposition the needle) so that you can sew back in the opposite direction.
7. Then stitch all the way down again. Keep this line of stitching as close as possible to the line you just did (I like to overlap them a bit). Keep doing this until the tear is covered and secure.
I did it on a piece of denim with white thread to help you see better...
Leave the needle down in the fabric, lift the presser foot and pivot the fabric around so you can sew back up the tear again...
Sew back down the tear...
Overlap the line of stitches a little bit, then keep going til the tear is covered and secure.
This is what it looks like on the inside...
And there you are, no more hole! Though I guarantee you this won't be the last time I'll be repairing these shorts!


0 comments:
Post a Comment